[et_pb_section fb_built=”1″ fullwidth=”on” admin_label=”Section” _builder_version=”3.22″ transparent_background=”off” make_fullwidth=”off” use_custom_width=”off” width_unit=”on”][et_pb_fullwidth_image src=”https://avad7.com/wp-content/uploads/2020/10/20201007we0714-raspberry-pi-news-and-resources-header.jpg” title_text=”20201007we0714-raspberry-pi-news-and-resources-header” url=”https://avad7.com/technology” admin_label=”Technology – Header” _builder_version=”4.6.5″ border_style=”solid” animation=”off”][/et_pb_fullwidth_image][/et_pb_section][et_pb_section fb_built=”1″ admin_label=”section” _builder_version=”3.22.3″][et_pb_row admin_label=”row” _builder_version=”3.25″ background_size=”initial” background_position=”top_left” background_repeat=”repeat”][et_pb_column type=”4_4″ _builder_version=”3.25″ custom_padding=”|||” custom_padding__hover=”|||”][et_pb_text admin_label=”Raspberry Pi – About” _builder_version=”4.6.5″ background_size=”initial” background_position=”top_left” background_repeat=”repeat” use_border_color=”off” border_color=”#ffffff” border_style=”solid”]
About
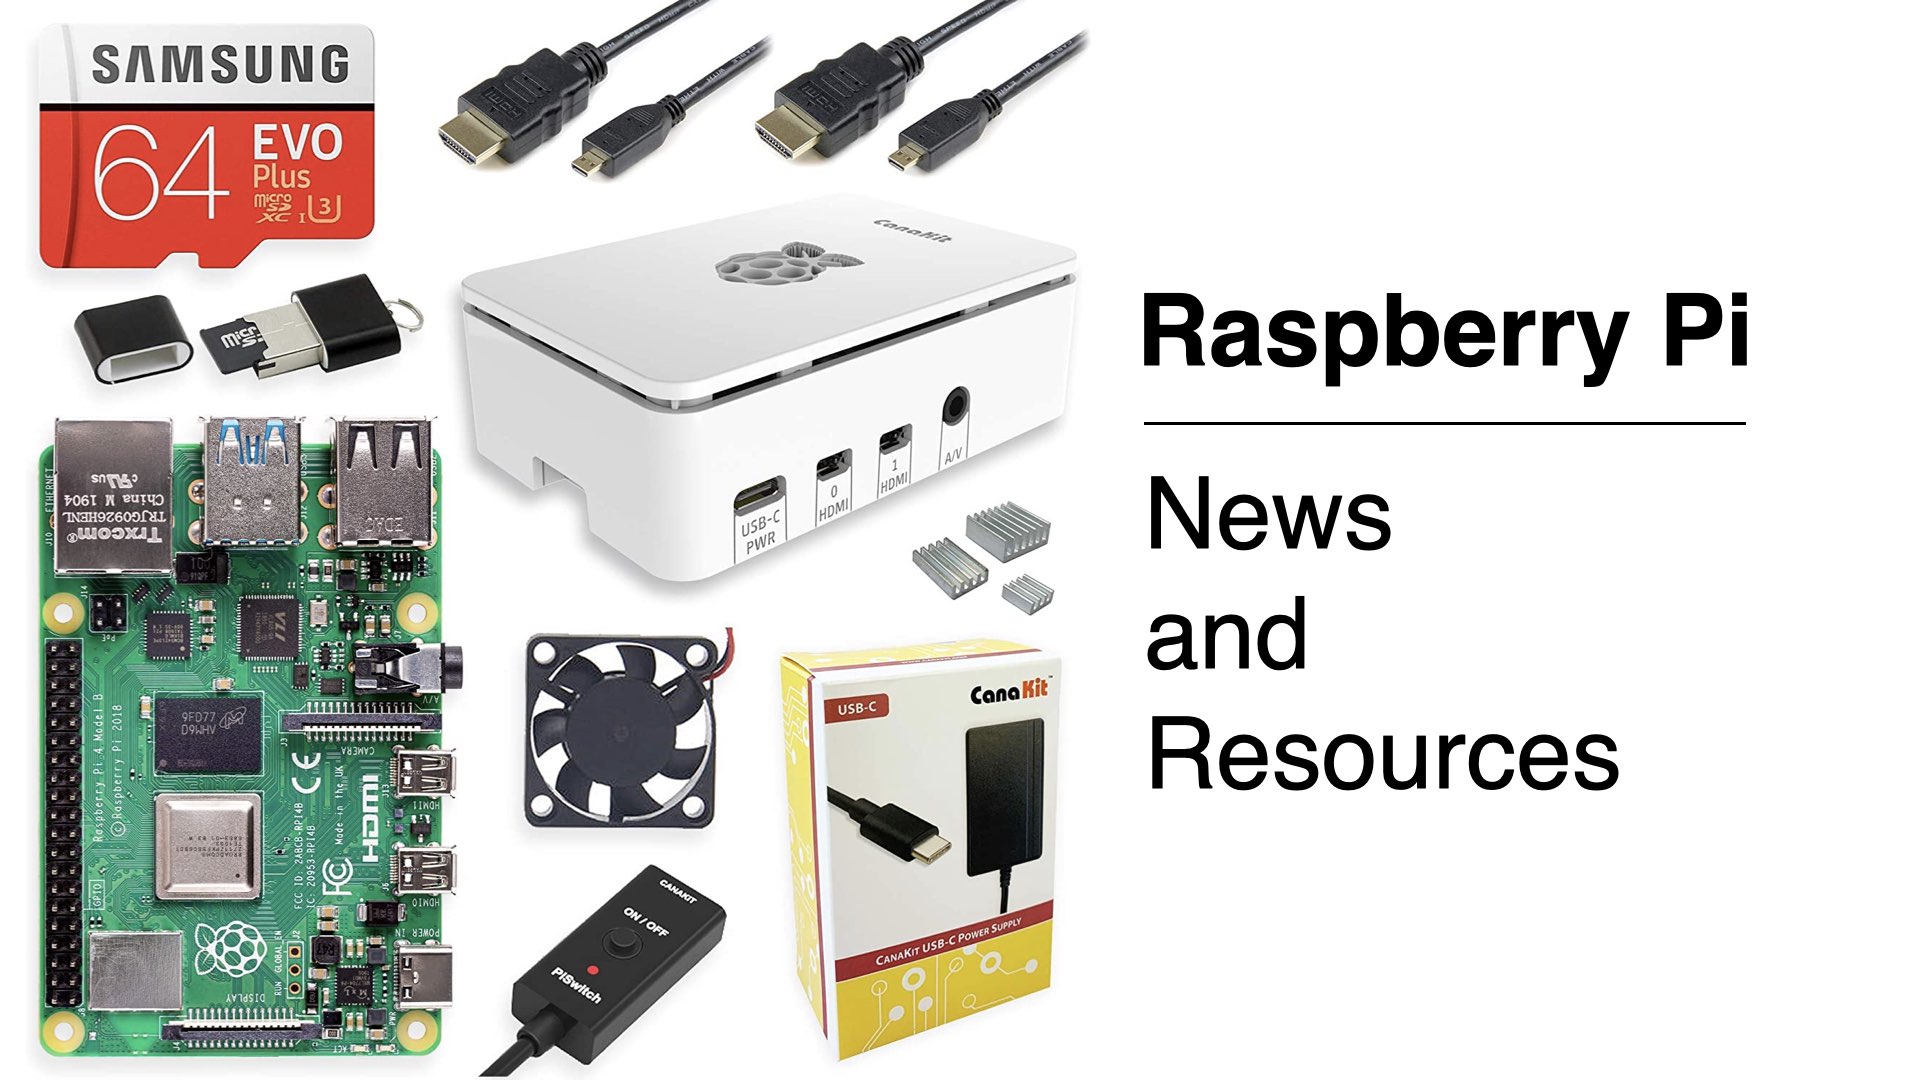
Raspberry Pi is a small, low cost, energy efficient, powerful computer that runs a version of the Linux operating system. This page is a portal to Raspberry Pi news and resources available on this site and elsewhere.
[/et_pb_text][et_pb_text admin_label=”Raspberry Pi – Overview” _builder_version=”4.6.5″ background_size=”initial” background_position=”top_left” background_repeat=”repeat” use_border_color=”off” border_color=”#ffffff” border_style=”solid”]
Overview
When you setup a Raspberry Pi computer, the system will start from an SD card that is inserted in the device. It’s a good idea to keep your own files on an external drive in case you have problems with your Raspberry Pi. Having your primary files on an external drive makes it possible to easily use another computer. An external flash drive formatted as MS-DOS (FAT-32) which ensures it can be used on Raspberry Pi (Linux), Windows, and Apple. Keeping your Raspberri Pi as simple as possible, using mostly the included software, ensures that you would have a fairly simple recovery process.
[/et_pb_text][et_pb_text admin_label=”Raspberry Pi – Getting Started” _builder_version=”4.6.5″ background_size=”initial” background_position=”top_left” background_repeat=”repeat” use_border_color=”off” border_color=”#ffffff” border_style=”solid”]
Getting Started
To get started with a Raspberry Pi computer, you will want to purchase a kit that includes the parts and accessories that can be easily assembled following the included instructions. [Learn More] In addition to the computer kit, you will need a keyboard, mouse, and a display (or two). A modern television or computer display capable of HDMI input will work. If your kit doesn’t include a mini-HDMI to standard-HDMI cable, you will need to purchase one (or two). Once the hardware is assembled, you will follow some instructions to install the Raspberry Pi operating system. Here are some essential links for getting started.
- Raspberry Pi 4 Model B – Best Kits, Enclosures, Cases, and Cooling [View]
- Installing Screen Capture Snipping Utility [View]
- Installing the Thunderbird Email Client Software [View]
- Installing TeamViewer for Remote Tech Support [View]
- Setup Your HP Printer [View]
- Updating Raspberry Pi OS [View]
- Portable Tablet, Display, and Laptop Enclosures [View]
- LibreOffice Calc Spreadsheet Timestamp – Entering The Current Date and Time [View]
[/et_pb_text][et_pb_text admin_label=”Raspberry Pi – Faster Startup Drive” _builder_version=”4.6.6″ background_size=”initial” background_position=”top_left” background_repeat=”repeat” hover_enabled=”0″ use_border_color=”off” border_color=”#ffffff” border_style=”solid” sticky_enabled=”0″]
Faster Startup Drive with High Speed MicroSD Card
The Raspberry Pi system starts and runs the operating system, program files, and some user data files from a primary microSD card. The card typically included with the Raspberry Pi kit is a slower microSD card. You will likely want to purchase a faster microSD card. Examples would include the SanDisk 64GB Extreme [View] or SanDisk Extreme Pro 64GB [View] which would both provide much faster startup and running.
[/et_pb_text][et_pb_text admin_label=”Raspberry Pi – Energy Efficiency” _builder_version=”4.6.5″ background_size=”initial” background_position=”top_left” background_repeat=”repeat” hover_enabled=”0″ use_border_color=”off” border_color=”#ffffff” border_style=”solid” sticky_enabled=”0″]
Energy Efficiency
One benefit of using a Raspberry Pi computer is energy efficiency. The computer uses about 3 watts of power. By comparison, a typical desktop computer may use 300 watts of power. The reduced power consumption makes the Raspberry Pi a good choice for those wanting to use renewable energy sources. A single standard-sized solar panel produces 100 watts at peak. Portable battery packs can provide 100 watts of power at 5 volts for an hour, or 3 watts of power for several days. [Learn More]
[/et_pb_text][et_pb_text admin_label=”Raspberry Pi – Battery Powered” _builder_version=”4.6.6″ background_size=”initial” background_position=”top_left” background_repeat=”repeat” hover_enabled=”0″ use_border_color=”off” border_color=”#ffffff” border_style=”solid” sticky_enabled=”0″]
Battery Powered
Raspberry Pi computers are typically used with approved power cords that offer the proper voltage and amps. However, it is possible to use a battery pack to run your Raspberry Pi. Using a USB A to USB C cord for the Raspberry Pi 4, a power pack could run the system for many hours. [View on Amazon]
[/et_pb_text][et_pb_text admin_label=”Raspberry Pi – Cooling and Thermal Management” _builder_version=”4.6.5″ background_size=”initial” background_position=”top_left” background_repeat=”repeat” use_border_color=”off” border_color=”#ffffff” border_style=”solid”]
Cooling and Thermal Management
Early versions of the Raspberry Pi computers had less computing and graphics power, so it was possible to run them with limited thermal management. The tasks assigned to them were also relatively easy to perform so processors were not running at their maximum capacity, nor were they overclocked.
Today’s Raspberry Pi 4 models can get very hot if not cooled properly. Heat sinks are metal fins that help naturally dissipate heat. Sometimes a fan is added to increase the cooling efficiency. However, most Raspberry Pi fans and cooling assemblies, while adequate, have limitations.
For example, the standard small cooling fan that comes with the CanoKit packages will be a bit noisy even when running at the slower speed. The logo design eteched into the top cover doubles as an air intake or exhaust (depending on what direction you install the fan), but it is obstructed and too small to permit optimal airflow.
The best cooling solution for a Raspberry Pi is to use a USB-powered quiet 9-inch fan that blows over the top of the open case to completely move the warm air away from the device, and allow cooler air to replace the warm air. [View on Amazon]
[/et_pb_text][et_pb_text admin_label=”Raspberry Pi – Helpful Commands” _builder_version=”4.6.5″ background_size=”initial” background_position=”top_left” background_repeat=”repeat” use_border_color=”off” border_color=”#ffffff” border_style=”solid”]
Helpful Commands
Many tasks on Raspberry Pi can be performed by typing in commands. These commands can be used in terminal mode, sometimes called command prompt mode. The commands are listed here by topic with a description and the command information. For most examples below, commands are shown inside of quote marks, but those are not needed when typing the command at the command line.
- Active Monitoring. For some commands, it is desirable to have the resulting output updated regularly for continuous monitoring, such as temperature. You can do this with a “watch” modifier. So, for example, to continually monitor temperature you can use this command: watch vcgencmd measure_temp
- Root Login – Disable. If you have enabled the root user account login as described below and subsequently want to disable it, you can use this command which causes root to have an invalid password and thus not work for login: sudo usermod –pass=”*” root
- Root Login – Enable. Normally one would avoid enabling root login because if you login using the root user account, you will be logged in as a super-user with the potential for harmig the computer file system if you do something incorrectly. The only time to use this would be if you have attached a hard drive with user permissions that are making it difficult to recover files.
(1) Type “sudo su –” and press enter.
(2) Then type “sudo passwd” to set a root password.
(3) Logout of your Raspberry Pi user account and from the login screen username drop-down menu choose Other and then type in root and the password you set in step #2 above. - Software – Install. To install a software program, use this command: sudo apt install [package-name]
- Software – Remove. To remove a software program, use this command: sudo apt remove [package-name]
- Temperature. If you are running an intensive task on your Raspberry Pi, the processor temperature could rise which can cause the processor to slow down. This is caused throttling. If you have poor passive cooling, or inadequate active cooling (with a fan), and the temperature gets too high, the unit could become damaged. You can check the temperature with this command: vcgencmd measure_temp
- Throttling Status. If you are concerned about your Raspberry Pi overheating and causing throttling, you can check the throttling status with this command which should return a zero x zero result: vcgencmd get_throttled
[/et_pb_text][et_pb_text admin_label=”Raspberry Pi – Support Topics” _builder_version=”4.6.5″ background_size=”initial” background_position=”top_left” background_repeat=”repeat” use_border_color=”off” border_color=”#ffffff” border_style=”solid”]
Support Topics
These are some topic links to articles here and elsewhere.
- SD Card Speed. The Raspberry Pi starts up from an SD memory card as its primary hard drive. There is some concern about varying speeds depending on which SD brand and standard are used. The official Raspberry Pi blog has a good article about this topic from March 2020. [View]
- Video Display – 4K. If you are using a 4K video display for your Raspberry Pi you may notice it connects at 30 frames per second (fps). This can result in poor video quality or mouse tracking. To switch to 1920 x 1080 with 60fps, go to the Raspberry Pi menu > Preferences > Screen Configuration. From the Configure menu, choose Screens > HDMI1 > Resolution > 1920×1080. Your display may flicker or need to be reset for proper framing of the new resolution.
[/et_pb_text][et_pb_text admin_label=”Raspberry Pi – Introduction” _builder_version=”4.6.5″ background_size=”initial” background_position=”top_left” background_repeat=”repeat” use_border_color=”off” border_color=”#ffffff” border_style=”solid”]
Recent Articles
Below are documents on this site relating to Raspberry Pi setup and use.
[/et_pb_text][et_pb_blog fullwidth=”off” include_categories=”2774″ show_author=”off” show_categories=”off” _builder_version=”4.6.5″ _module_preset=”default”][/et_pb_blog][/et_pb_column][/et_pb_row][/et_pb_section][et_pb_section fb_built=”1″ fullwidth=”on” admin_label=”Section” _builder_version=”3.22″ transparent_background=”off” make_fullwidth=”off” use_custom_width=”off” width_unit=”on” global_module=”13530″][et_pb_fullwidth_image src=”https://avad7.com/wp-content/uploads/2008/01/20160208mo0639-students-bench.jpeg” admin_label=”Tech Footer – Students” _builder_version=”3.0.87″ background_size=”initial” background_position=”top_left” background_repeat=”repeat” use_border_color=”off” border_color=”#ffffff” border_style=”solid” animation=”off”][/et_pb_fullwidth_image][/et_pb_section]