Summary
This page describes how you can use the Classic Editor features with your WordPress.com hosted website.
STEP #1 – New Block Module
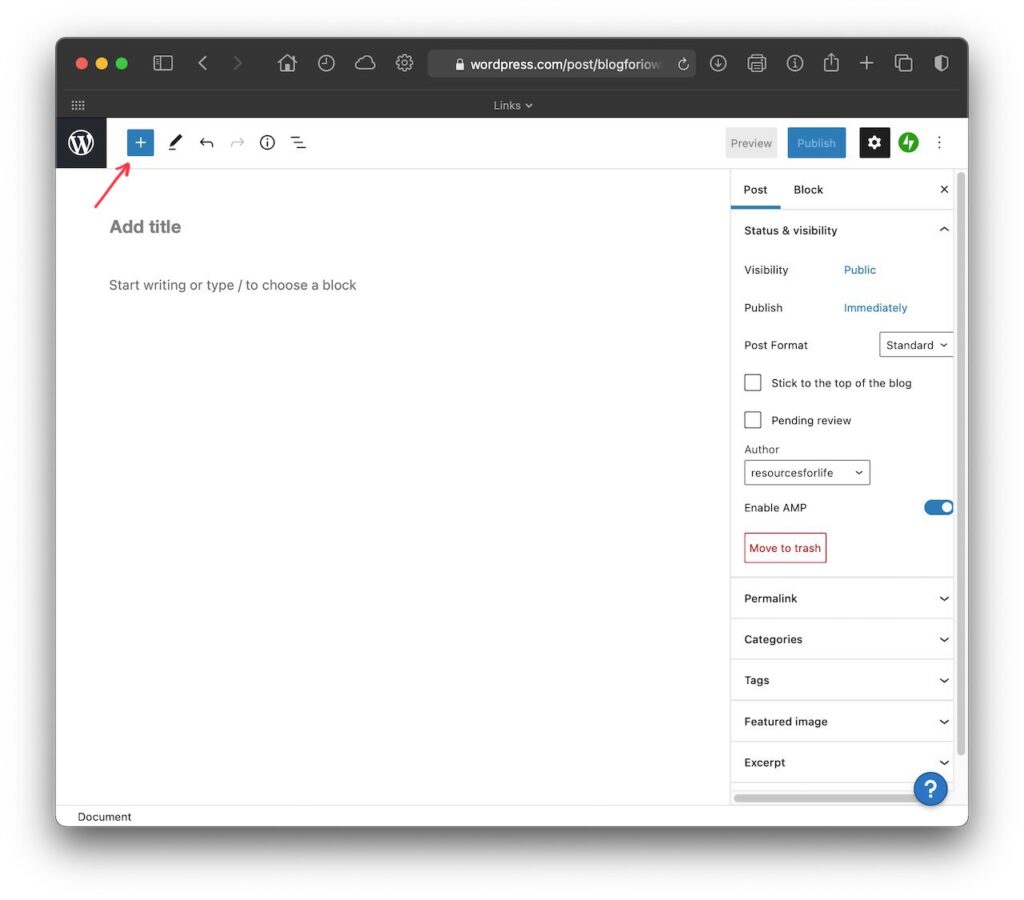
Start a new post or page and then click on the plus in the top left to choose a new block module as shown below. The red arrow indicates where to click.

STEP #2 – Choose the Classic Module
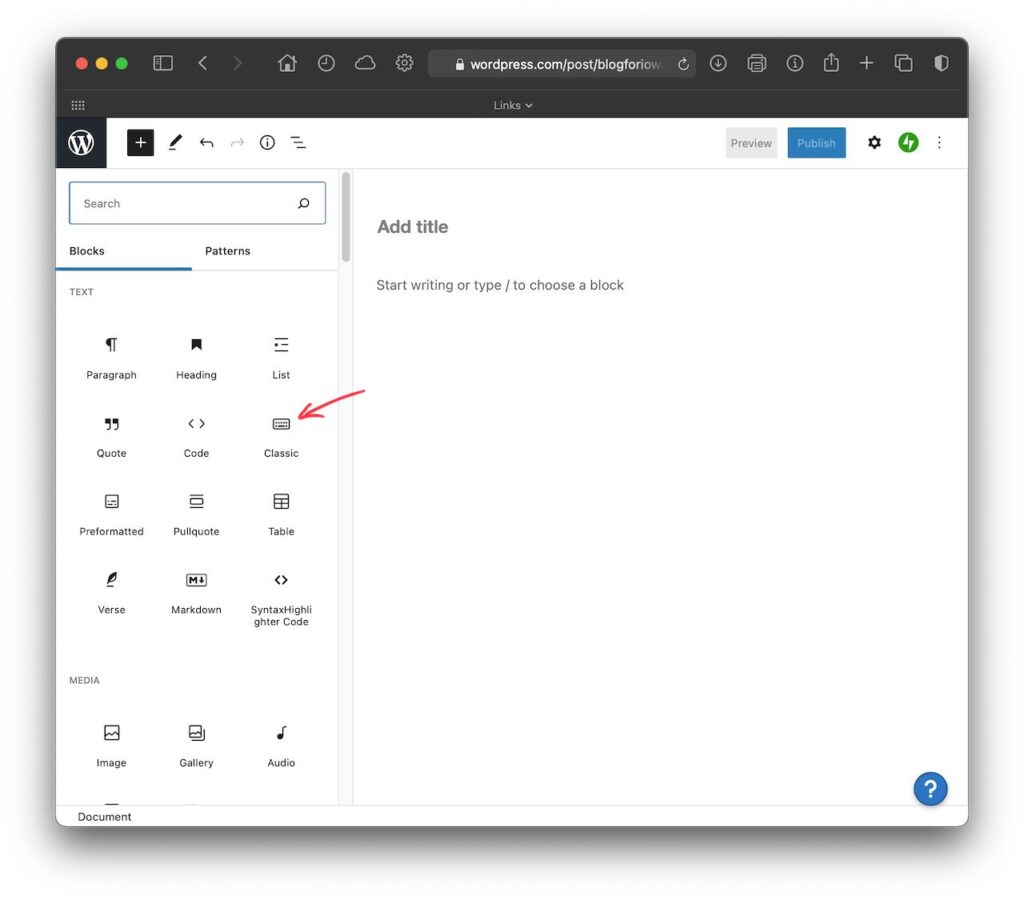
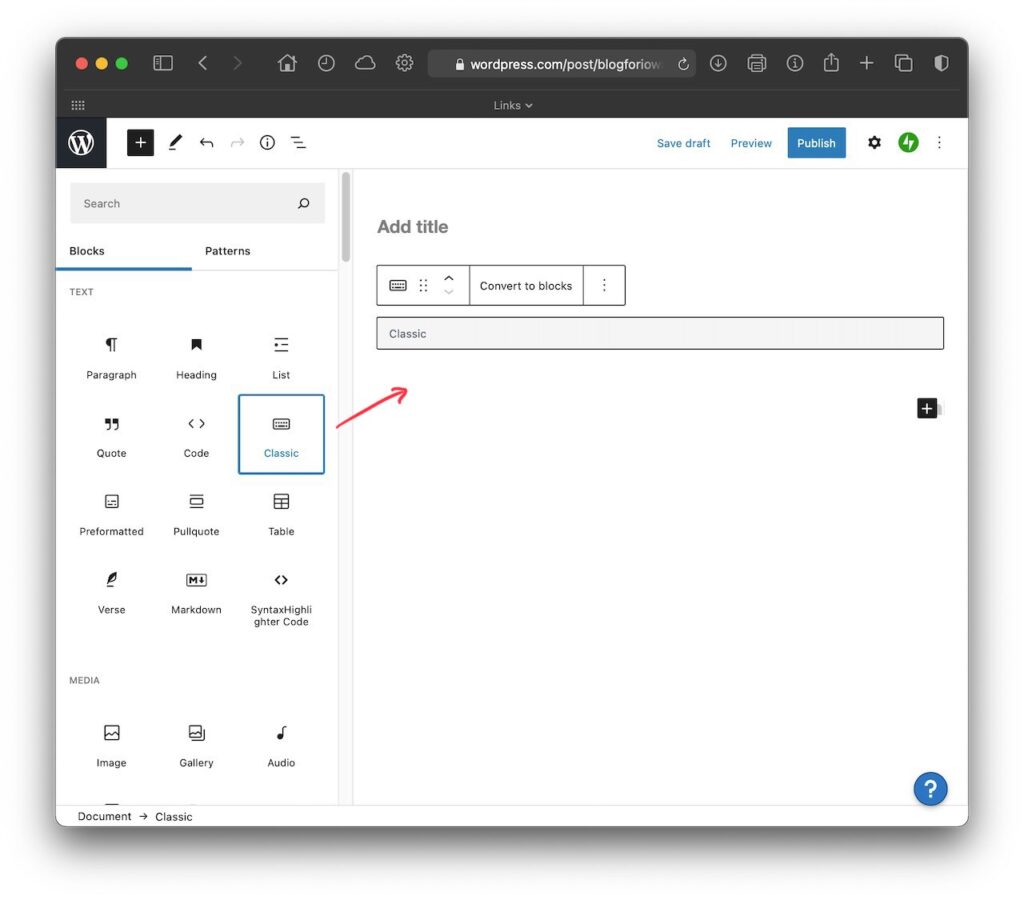
Click on the Classic module option to have that module inserted on your page. The red arrow in the image below shows the Classic module option.

STEP #3 – Using Classic Editor Module
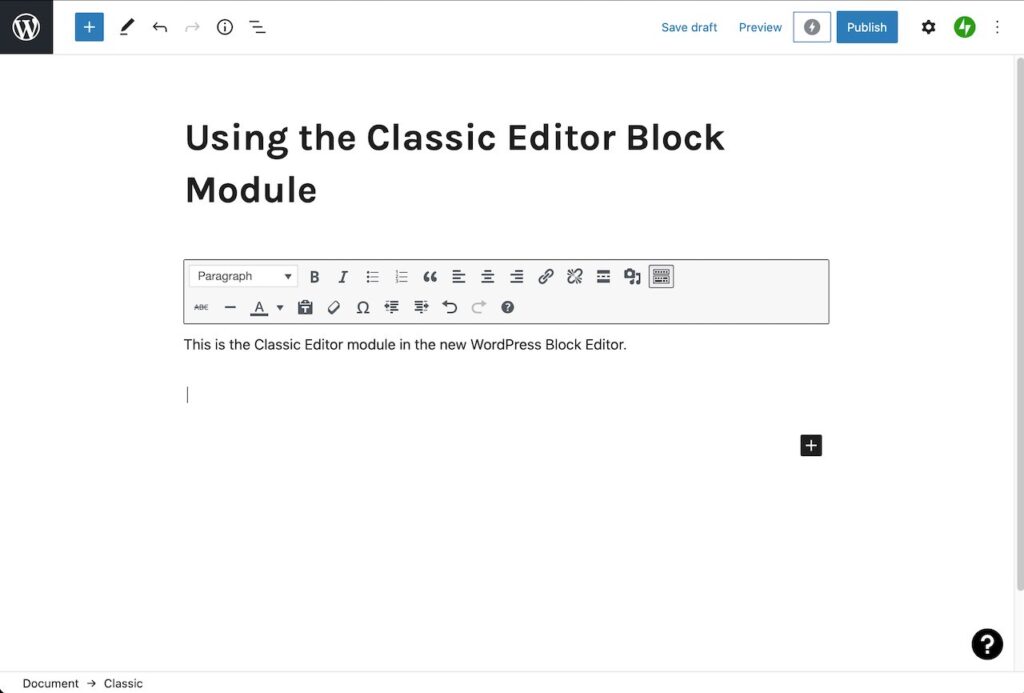
Once you select the Classic Editor module, you can begin typing below the header banner and using the familiar options it offers as shown below.

When you begin typing in the Classic Editor block module area, the familiar toolbar will appear as shown below. Otherwise, the toolbar options aren’t visible.

Other Scenarios
If your WordPress website is hosted with a company like DreamHost or GoDaddy, then you are likely able to install the Classic Editor plug-in and continue editing with that familiar interface.
For people using WordPress.com hosting for their WordPress website, you would need to pay a few hundred dollars for the Business Plan ($300/yr) to enable the ability to add the Classic Editor plugin (and other plug-ins). The Personal ($48/yr) and Premium ($96/yr) hosting plans do not include the ability to add plugins. For more information about plans, view the WordPress.com hosting pricing page.
